I have considered and evaluated several mcu functionality+wifi boards, and 'pcduino lite wifi' is the board I chose to proceed forward with.
It is an ARM cpu running Linaro 12.07. What you need to get started is an hdmi cable for video, a usb hub, mouse and keyboard, and then a 'USB Cable A-micro' usb cable.
It is an ARM cpu running Linaro 12.07. What you need to get started is an hdmi cable for video, a usb hub, mouse and keyboard, and then a 'USB Cable A-micro' usb cable.
The default username for the pcduino is 'ubuntu'. On startup press F8, and then set the password.
The next step is to get the pcduino to connect to your home wireless network, this is the easiest way:
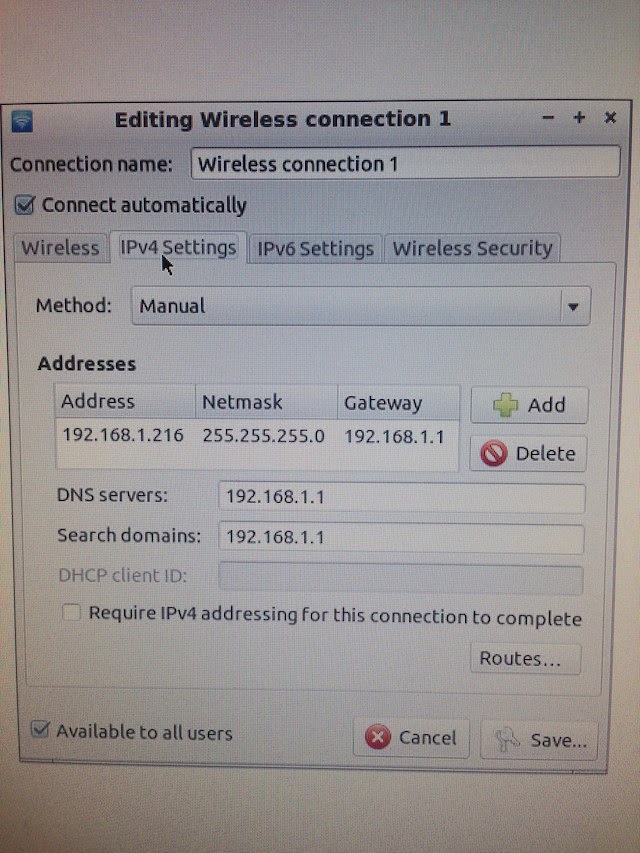
But you should assign it a static ip. These are the settings I used.
I set the pcduino to have an ip of 192.168.1.216 on my local wifi network.
And my wifi network is using WPA2 security, so there are these settings:
Now with those steps done, I can remotely ssh into the pcduino to do any administration/coding that I need to do. On my mac I opened up the terminal app:
Then enter in the password that you specified for the ubuntu user, and you are in. Now you only have to have power connected to the pcduino to put and run code on it.
Once you ssh in, install nano by typing
sudo apt-get install nano
Now lets setup arduino style programming:
cd ~
mkdir rezaWork
cd rezaWork
git clone http://github.com/pcduino/c_environment
cd c_environment
make
This compiles all of the sample arduino programs.
Lets run the blink example:
cd output
cd test
./linker_led_test 13
The LED on the board blinks.
If you wanna change the blink time:
cd ~
cd rezaWork
cd c_environment
cd sample
nano linker_led_test.c
Now change the blink delay, then save and exit out of nano.
Now you have to recompile and run:
cd ~
cd rezaWork
cd c_environment
make
cd output
cd test
./linker_led_test 13
The LED now blinks at whatever interval you set it to.


No comments:
Post a Comment