Controlling the ph of a solution by hand is hard and tedious. It is a prime candidate for automation.


Lets go over the materials you will need to gather:
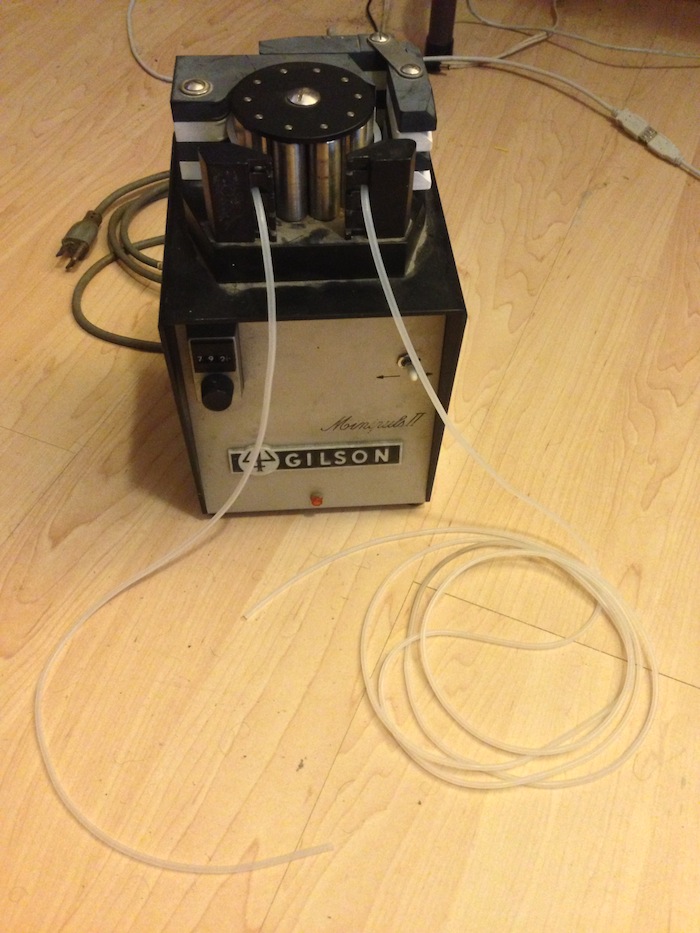
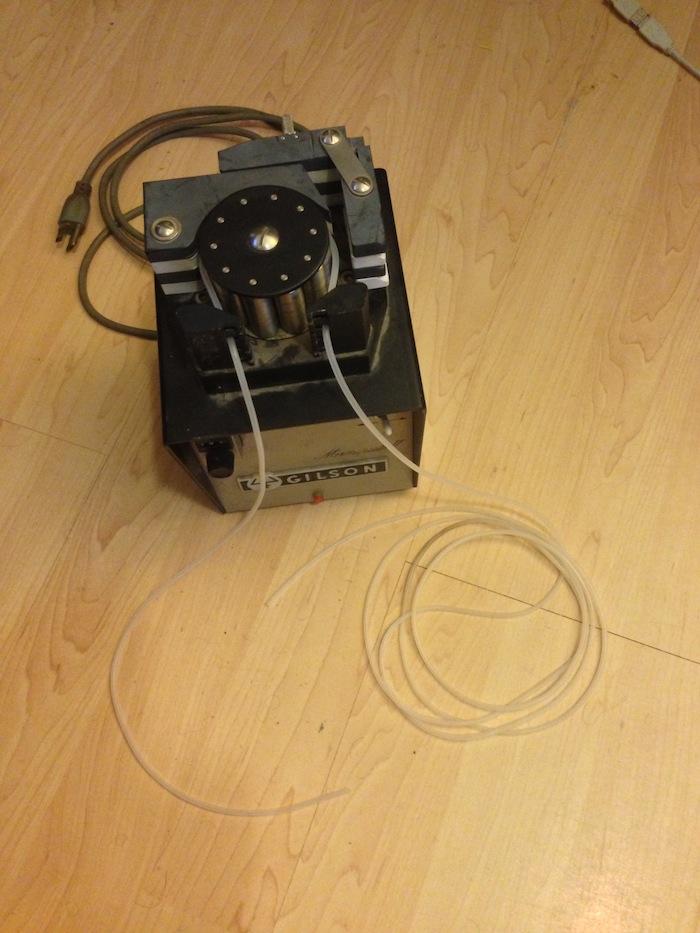
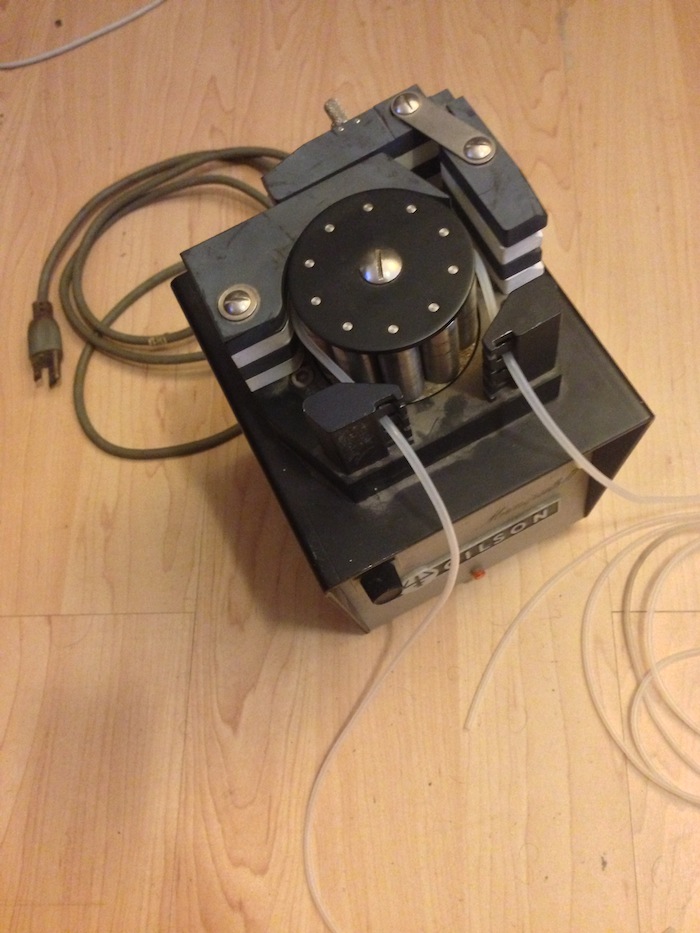
1. First you will need to buy a peristaltic pump. I bought mine off of ebay for 85$(You are saving money on anything that you get under $175 vs retail). To find them search "peristaltic pump" on ebay. Here are some pics of the one I bought. Make sure you buy a manual one, not one with it's own computer, because the pump will be controlled by an arduino.
Normally, in a ph solution, the ph if left alone will rise out of the desired range. To knock the ph back down we add an acid, which lowers the ph. Acids cause corrosion. For this reason a peristaltic pump is the correct answer for dosing acid because a peristaltic pump does not come in contact with the solution that it is pumping and less likely be corroded.
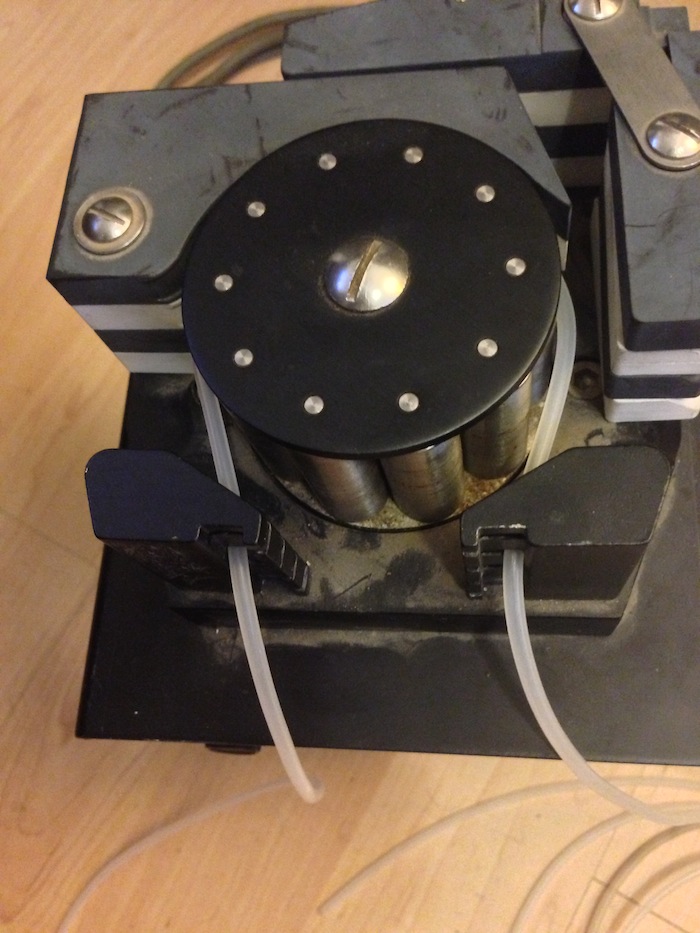
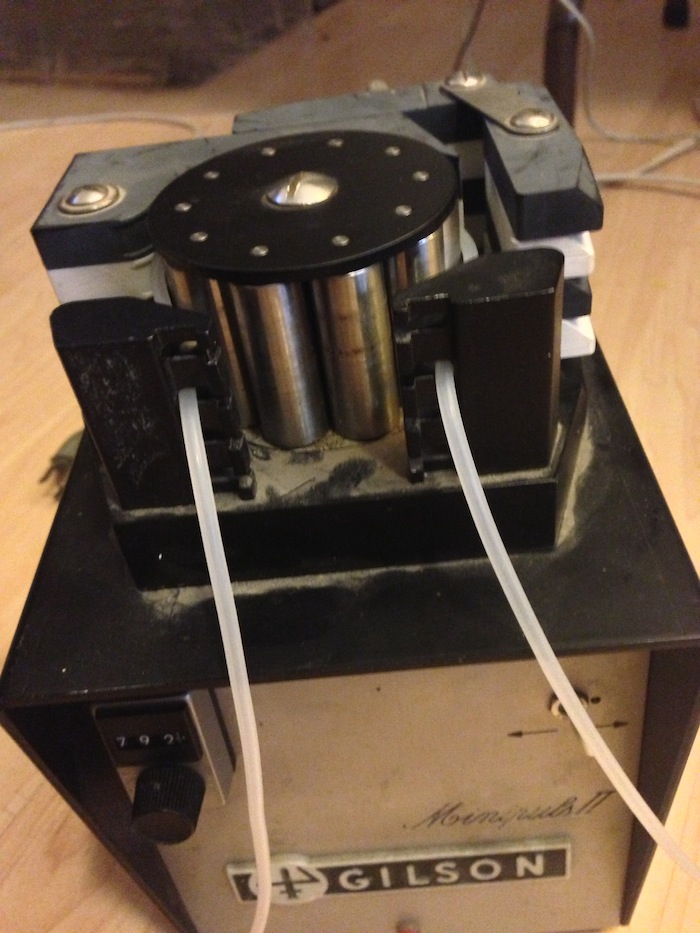
2. The second item you will need is peristaltic pump tubing. The peristaltic pump works by squeezing liquid through tubing. Here is some info about tubing. For my setup I used 1/16" ID x 1/8" OD 0.30" wall silicone tubing. You can search "1/16 id 1/8 od silicone tubing" on google and it will show up, but make sure you buy the correct tubing for your pump.
Here are some pics of the tubing installed in the pump. As you can see, when the pump is on, the head turns and squeezes liquid through the tube. The knob on the left controls the rate that the head spins at, and the switch controls the direction that the head rotates in.
3. The third item you need is a container that will hold the solution. I am using some glassware that I had Allen Scientific Glass in Boulder, Colorado make for me.


Remember that I said that the acids that are mixed into a solution to lower its ph are corrosive. Glass is a good pick for a container because it has a very good 'chemical resistance'. To see how it compares to other materials see this. For most chemicals, it shows no damage after 30 days, and for others only surface etching.
The acid I am using is labeled 'ph down'. I know from working with ph down that it is usually diluted phosphoric acid.
Looking at the sheet, Glass shows no damage after 30 days of exposure to Phosphoric Acid 5% and 85%. But if you pay attention the HDPE material also shows no damage after 30 days of exposure to Phosphoric acid 5% and 85%.
So if glass is too expensive, use HDPE.
HDPE buckets are readily available online. I might switch to using them if I need a larger container. I would recommend an HDPE bucket from an online diy home brewing store because they usually have a spigot, from which you can easily drain the bucket, or extract a portion of the solution. You can find these by searching google for 'fermenting bucket.' This is what searching "fermenting bucket with spigot" came up with:


7. A relay that can be controlled by a micro controller. I will be using this with an arduino to turn the peristaltic pump on and off.


7. Now it is time to load the full program and set it up. Create a new sketch and paste the following code in to it:
Remember that I said that the acids that are mixed into a solution to lower its ph are corrosive. Glass is a good pick for a container because it has a very good 'chemical resistance'. To see how it compares to other materials see this. For most chemicals, it shows no damage after 30 days, and for others only surface etching.
The acid I am using is labeled 'ph down'. I know from working with ph down that it is usually diluted phosphoric acid.
Looking at the sheet, Glass shows no damage after 30 days of exposure to Phosphoric Acid 5% and 85%. But if you pay attention the HDPE material also shows no damage after 30 days of exposure to Phosphoric acid 5% and 85%.
So if glass is too expensive, use HDPE.
HDPE buckets are readily available online. I might switch to using them if I need a larger container. I would recommend an HDPE bucket from an online diy home brewing store because they usually have a spigot, from which you can easily drain the bucket, or extract a portion of the solution. You can find these by searching google for 'fermenting bucket.' This is what searching "fermenting bucket with spigot" came up with:
4. The fourth item you will need is a ph probe. Aside from minor differences, all of them are the same. I am using this one, and I am using it specifically because it is threaded.
The reason I am using a threaded ph probe is because I can screw it into the glassware I had made. Im not going to take off the ph probe boot yet, but this is the part where it screws in.
5. You will need some 7.0 and 4.0 ph probe calibration fluid. You should buy some from the same place that you get your probe. But if you need a online source you can use omega.
6. This is the ph down that I am using. Use whatever is appropriate for your application.
8. An arduino, I am using a arduino uno.
9. A arduino ph shield. I make these and sell them here.
10. A arduino screw terminal shield. This will hold the wires in without soldering.
11. The last item you need is an lcd shield. I bought this on ebay, from seller emartee2009. The listing you should look for will be something like 'Nokia 5110 LCD Shield With SD -Arduino Compatible'.
I will be using the arduino and ph shield+probe to monitor the ph, display it on the lcd screen shield, and then control the ph by turning on the peristaltic pump that administers ph down into the container.
The next steps cover assembly and programming of the controller.
1. Insert the screw shield into the arduino uno.
2. Insert the ph shield on top of it.
3. Insert the lcd shield next.
4. Connect the ph probe.
5. Now connect the arduino to your computer via usb and start the arduino IDE. If you do not have the arduino IDE installed, go to the download page.
The first thing we need to do is install the library for the lcd shield to work.
Now we need to copy the library to the arduino library folder. It is in different locations on the windows version, osx version, and linux version.
On OSX, you need to show package contents on the arduino.app file.
Then the libraries folder is located in
Contents > Resources > Java > Libraries
Alternatively, you can also create a library folder in the Home > Documents > Arduino folder.
Copy the extracted LCD5110 folder to the arduino libraries folder.
On windows and linux you will have to find out where the arduino libraries folder is. I know that when you download the windows version the arduino ide is in a folder, so it should be somewhere under that folder.
6. Now we make sure the LCD works by itself first. Open the Arduino IDE if you do not have it running and select the LCD example:
Make sure your arduino is connected to your computer by usb then hit upload.
You should see the result on the LCD.
Once you have verified the LCD works, then you can proceed.
#include <EEPROM.h>
#include <LCD5110.h>

//My scratch notes
//measuredPH-6.8580 roomTempMeasuredPH-6.8965
//tempC-28.0195 phVolts-2.3535 7CalVolts-2.3047 4CalVolts-3.3594 4CalTempAdjusted-3.9640


//float volt4 = 3.359;
//float volt7 = 2.304;
//float calibrationTempC = 21;

float volt4 = 3.341;
float volt7 = 2.304;
float calibrationTempC = 31.1;


//A3 = temp
//A2 = PH
//CALIBRATE = D8
int phPin = A2;
int tempPin = A3;
int calPin = 8;
int relayPin =13;

void setup()
{
    LcdInitialise();
    LcdClear();
    Serial.begin(9600);

    pinMode(relayPin,OUTPUT);
    digitalWrite(relayPin,LOW);
}

float measurePHVolts()
{
    float phADC = analogRead(phPin);
    float phVolts = (phADC/1024.0)*5.0;
    return phVolts;
}

float getTempAdjusted4()
{
    //http://www.omega.com/Green/pdf/pHbasics_REF.pdf
    float adjustTemp = calibrationTempC;
    float difference = adjustTemp-25;
    float phAdjust = (0.009 * difference);
    float tempAdjusted4 = 4 + phAdjust;
    return tempAdjusted4;
}

float measurePH()
{

    float phVolt = measurePHVolts();

    float tempAdjusted4 = getTempAdjusted4();
    float voltsPerPH = (abs(volt7-volt4)) / (7-tempAdjusted4);

    //acid ph's produce positive voltages, basic ph's produce negative voltages
    //that one site was wrong

    float realPHVolt = (volt7 - phVolt);
    float phUnits = realPHVolt / voltsPerPH;
    float measuredPH = 7 + phUnits;

    return measuredPH;
}

float doPHTempCompensation(float PH, float temp)
{
    float difference = temp-25;
    float phAdjust = (0.009 * difference);
    float tempAdjustedPH = PH + phAdjust;
    return tempAdjustedPH;
}


float measureTempC()
{
    float tempADC = analogRead(tempPin);
    float tempVolts = (tempADC/1024)*5.0;
    float tempC = (tempVolts/0.010);
    return tempC;
}


// floatToString.h
//
// Tim Hirzel
// tim@growdown.com
// March 2008
// float to string
//
// If you don't save this as a .h, you will want to remove the default arguments
//     uncomment this first line, and swap it for the next.  I don't think keyword arguments compile in .pde files

//char * floatToString(char * outstr, float value, int places, int minwidth=, bool rightjustify) {
char * floatToString(char * outstr, float value, int places, int minwidth=0, bool rightjustify=false) {
    // this is used to write a float value to string, outstr.  oustr is also the return value.
    int digit;
    float tens = 0.1;
    int tenscount = 0;
    int i;
    float tempfloat = value;
    int c = 0;
    int charcount = 1;
    int extra = 0;
    // make sure we round properly. this could use pow from <math.h>, but doesn't seem worth the import
    // if this rounding step isn't here, the value  54.321 prints as 54.3209

    // calculate rounding term d:   0.5/pow(10,places)
    float d = 0.5;
    if (value < 0)
        d *= -1.0;
    // divide by ten for each decimal place
    for (i = 0; i < places; i++)
        d/= 10.0;
    // this small addition, combined with truncation will round our values properly
    tempfloat +=  d;

    // first get value tens to be the large power of ten less than value
    if (value < 0)
        tempfloat *= -1.0;
    while ((tens * 10.0) <= tempfloat) {
        tens *= 10.0;
        tenscount += 1;
    }

    if (tenscount > 0)
        charcount += tenscount;
    else
        charcount += 1;

    if (value < 0)
        charcount += 1;
    charcount += 1 + places;

    minwidth += 1; // both count the null final character
    if (minwidth > charcount){
        extra = minwidth - charcount;
        charcount = minwidth;
    }

    if (extra > 0 and rightjustify) {
        for (int i = 0; i< extra; i++) {
            outstr[c++] = ' ';
        }
    }

    // write out the negative if needed
    if (value < 0)
        outstr[c++] = '-';

    if (tenscount == 0)
        outstr[c++] = '0';

    for (i=0; i< tenscount; i++) {
        digit = (int) (tempfloat/tens);
        itoa(digit, &outstr[c++], 10);
        tempfloat = tempfloat - ((float)digit * tens);
        tens /= 10.0;
    }

    // if no places after decimal, stop now and return

    // otherwise, write the point and continue on
    if (places > 0)
    outstr[c++] = '.';


    // now write out each decimal place by shifting digits one by one into the ones place and writing the truncated value
    for (i = 0; i < places; i++) {
        tempfloat *= 10.0;
        digit = (int) tempfloat;
        itoa(digit, &outstr[c++], 10);
        // once written, subtract off that digit
        tempfloat = tempfloat - (float) digit;
    }
    if (extra > 0 and not rightjustify) {
        for (int i = 0; i< extra; i++) {
            outstr[c++] = ' ';
        }
    }


    outstr[c++] = '\0';
    return outstr;
}


void loop()
{
    int x;
    int sampleSize = 500;

    float avgMeasuredPH= 0;
    float avgRoomTempMeasuredPH =0;
    float avgTemp = 0;
    float avgPHVolts =0;
    float avgVoltsPerPH =0;
    float phTemp = 0;


    float tempAdjusted4 = getTempAdjusted4();

    for(x=0;x< sampleSize;x++)
    {

        float measuredPH = measurePH();
        float phTemp = measureTempC();
        float roomTempPH = doPHTempCompensation(measuredPH, phTemp);

        float phVolt = measurePHVolts();

        avgMeasuredPH += measuredPH;
        avgRoomTempMeasuredPH += roomTempPH;
        avgTemp += phTemp;
        avgPHVolts += phVolt;
    }

    avgMeasuredPH /= sampleSize;
    avgRoomTempMeasuredPH /= sampleSize;
    avgTemp /= sampleSize;
    avgPHVolts /= sampleSize;

    Serial.print(" measuredPH-");
    Serial.print(avgMeasuredPH,4);
    Serial.print(" roomTempMeasuredPH-");
    Serial.print(avgRoomTempMeasuredPH,4);
    Serial.print(" tempC-");
    Serial.print(avgTemp,4);
    Serial.print(" phVolts-");
    Serial.print(avgPHVolts,4);
    Serial.print(" 7CalVolts-");
    Serial.print(volt7,4);
    Serial.print(" 4CalVolts-");
    Serial.print(volt4,4);
    Serial.print(" 4CalTempAdjusted-");
    Serial.println(tempAdjusted4,4);


    drawBox();
    char charBuffer[25];
    gotoXY(5,1);
    LcdString("PH:");
    gotoXY(30,1);
    floatToString(charBuffer,avgRoomTempMeasuredPH,2);
    LcdString(charBuffer);

    gotoXY(4,2);
    LcdString("TempC: ");
    gotoXY(45,2);
    floatToString(charBuffer,avgTemp,1);
    LcdString(charBuffer);

    gotoXY(4,3);
    LcdString("V:");
    gotoXY(20,3);
    floatToString(charBuffer,avgPHVolts,3);
    LcdString(charBuffer);

    if(avgMeasuredPH > 5.9)
    {
      digitalWrite(relayPin,HIGH);
      gotoXY(4,4);
      LcdString("dosing on");
    }
    else
    {
      digitalWrite(relayPin,LOW);
      gotoXY(4,4);
      LcdString("dosing off");
    }


}
Connect your ph probe, and after clicking upload you should see a screen like this:

8. Now we calibrate the ph probe. The reason we need to calibrate is because ph probes age. Normally they output a certain +-mv per ph, but over time this drifts. Calibration overcomes this inconvenient fact of life. Here I have the ph 4.01 calibration solution on the left, tap water(If you have distilled water that is better) in the middle, and ph 7.0 calibration on the right.

First rinse your ph probe in the tap water.

Then dip your ph probe in the 7.0 solution and write down the voltage value. It is 2.304 volts.

Now re-rinse the probe.

The next step is to dip your probe in the 4.0 calibration solution. Write down the volts and temperature. So 3.341 volts and 31.1C. As you can see my thermostat kicked in.
Since temperature has no effect on ph at ph 7, we do not record it then. Temperature does affect the 4.0 ph measurement however, so we write it down.

Now we will plug the values that we wrote down into the program. Find the following variables:

We need to change them to the values that we just measured.
volt4 = 3.341;
volt7 = 2.304;
calibrationTempC = 31.1;

Then press upload. This completes the calibration.
9. Step nine is to attach the relay to the arduino. You will need a 5/64" screwdriver for this part.


Wire the terminal labeled "+in" on the relay to pin 13 on the arduino. Wire the terminal labeled "-in" on the relay to GND on the arduino.

10. Now that we have the relay connected, we alter the code for when to turn the relay on. At the bottom of the code there is this snippet:
 Since I will be growing hydroponic strawberries in coco this summer(hopefully) a ph of 5.5-6.2 is the best range for me.
11. The rest of the steps are just assembly. Connect the relay to the peristaltic pump, connect the other end of the relay to power. Mount the ph probe into the solution container. Connect the peristaltic pump tubing to the ph down.
11. The rest of the steps are just assembly. Connect the relay to the peristaltic pump, connect the other end of the relay to power. Mount the ph probe into the solution container. Connect the peristaltic pump tubing to the ph down.


The reason the fluid in the video goes back and forth is because I tightened the peristaltic pump too tight around the tubing.
Also in the video the ph goes up at first because I just connected the probe and it still had a coating of 4.0 calibration solution on it.
I will rearrange the items a bit, and switch to using a wireless outlet to turn the peristaltic pump on and off.
HI Reza,
ReplyDeleteThanks for creating the hardware and excellent tutorials! I own two of your pH shields and finally getting towards implementing..
Q: When your doing the calibration - does it matter what the values in the code are for:
volt4 /volt7 calibrationTempC ?
Hello Greg!
DeleteThe values that you get when doing your calibration will be specific to the probe that you used, and calibrationTempC is for storing the temp that the calibrations were taken at. This is because the 4.0 calibration point needs to be temp compensated. You can use the default values, which are what my probe puts out, but you will lose precision.
I strongly recommend doing the calibration steps.
Best Regards
Once again you provide us the valuable information. thanks keep it up. we are following you.
Deletechemical dosing system
This looks like a great tutorial! I just started growing vegetables hydroponically and already see the need for automated pH dosing. I am going to follow in your footsteps. Did you implement this with a proper hydro setup? How did it turn out and do you have any more documentation?
ReplyDeleteAwesome!
-Revel
Sorry for the late reply! Yes I used it last summer to water tomatoes in coco pots. They grew well, but they are tomatoes which are easy. I want to grow strawberries, and am in the process of implementing an aeroponic setup. Should be ready maybe next summer or 2014 late summer. I haven't had enough time to devote to this since I started day trading.
DeleteThis is really a great writing I am also inspired and looking to start my blog on
Deletedosing metering pump manufacturer in india
This comment has been removed by a blog administrator.
ReplyDeleteIm lost
ReplyDeleteWhat if you needed pH up adjustment as well?
ReplyDeleteThanks for share this fantastic blog, really informative thanks
Deletewater treatment equipments
that's easy, inside if-else statement you can put relevant instructions for another pump/relay.
Deleteis it possible to calibrate unknown ph value? Because I only see people calibrate the ph 7 and 4 which u already know
ReplyDeleteReza — can you explain how these variables are used — tempPin and calPin? Can't figure out how it works, as there's no separate temp probe connected in your setup, is it? I have a non-pro version of this DF Robot ph probe, which doesn't have a separate line for temp, and I guess it does not differ from Pro version. What's the difference between these two anyway? Will the industrial version work better, and standard one is goin to fail at some point, when doing 24/7 monitoring? Any idea?
ReplyDeleteHi Reza!
ReplyDeleteCan the code be modified so that, instead of having a target set point (ex. 5.5-6.2), there is a dynamic target? For example, if I would like to have the pH probe read the ambient pH and then have the acid delivered until the pH drops 0.3 units, can I do that? I have a flow through system, and I want to adjust the pH downward by 0.3 units from the ambient pH always, can I program this to do that?
Hello Reza !
ReplyDeleteim using your sketch to make an Arduino Mega based controller for my greenhouse, making some modifications on the code now, i have a question.
In your code, before the setup you use a "int calPin = 8;", why is that? i cant see it in the rest of the code...
thank you !
Nice blog…
ReplyDeleteThanks for sharing
Data Logger, ORP Meter, Humidity Meter, Digital Counter, Conductivity Meter
This is Great Tutorial and Also thanks for Share your Coding. Chek my Site 123rom I will modified your Project in my site for application in Hidroponics ..
ReplyDeleteNice blog...
ReplyDeleteThanks for sharing...
ph controller, Humidity meter, Controller, Digital counter